Read Time:10 Minute, 52 Second
For a smooth and uninterrupted experience with your VR controller, it’s crucial to keep a close eye on its battery level. If you find that the battery drains quicker than expected, getting a new one might be essential. Learning how to replace the battery in your VR controller is a valuable skill that ensures your gaming sessions remain continuous. Don’t worry, this blog post has all the necessary details you need to master the battery replacement process in your VR controller.
Why it’s important to know how to change VR controller batteries
An understanding of how to change VR controller batteries is crucial for a seamless and uninterrupted virtual reality gaming experience. Imagine being immersed in a thrilling VR game, and suddenly, your controller loses power. It’s more than just annoying; it can totally disrupt your gaming momentum. By knowing how to swiftly replace the batteries, you eliminate this potential interruption, ensuring continuous and stress-free gaming sessions.
Furthermore, when you comprehend the process of changing VR controller batteries, it fosters a level of self-reliance. You no longer have to depend on customer service or deal with the hassles of sending your controller for maintenance. Replacing the batteries is a straightforward and efficient method to maintain the optimal functionality of your VR controller.
Mastering this skill offers benefits beyond mere frustration and time-saving. It encompasses:
- Amplifying your comprehension of your device and its upkeep;
- Elevating your immersion in VR gaming;
- Bestowing a feeling of mastery and authority over your gaming equipment;
- Diminishing superfluous costs associated with controller maintenance.
In essence, the ability to replace your VR controller batteries is an invaluable aptitude that substantially augments the pleasure and seamlessness of your virtual reality gaming encounters. It stands as an integral facet of preserving the durability of your VR gear and elevating your entire gaming experience
Types of VR controllers and their battery requirements
Virtual reality technology boasts a range of controller types, each with specific power requirements. Familiarity with your controller’s battery needs is vital for efficient maintenance and uninterrupted gameplay.
- Primary Power Source: These user-friendly controllers typically run on standard AA or AAA batteries;
- Battery Replacement Ease: Featuring a design that allows quick access to the battery compartment, replacing batteries is straightforward—usually by sliding a panel or removing a cover.
Key Maintenance Tips for Handheld Wand Controllers:
- Spare Battery Storage: Keep extra AA or AAA batteries ready to ensure continuous gameplay;
- Cost-effective Solution: Invest in rechargeable batteries to reduce expenses over time;
- Eco-friendly Disposal: Dispose of used batteries responsibly at designated recycling centers.
Controllers with Built-in Rechargeable Batteries: The Future of Convenience
- Eliminating Frequent Replacements: These advanced controllers are equipped with built-in batteries, negating the need for constant battery swaps;
- Charging Method: A simple connection via USB cable replenishes their power.
Insights for Optimal Use of Rechargeable Controllers:
- Regular Charging Routine: Establish a charging schedule to keep your controller ready for use;
- Power Backup Plan: Carry a power bank, especially while traveling, to charge your controller on the go;
- Battery Longevity: Prolonged use may reduce battery capacity. Consider professional assistance for battery replacement if performance declines.
Enhancing Your VR Experience with Proper Battery Management
Understanding the power requirements of your VR controller is a cornerstone of an enjoyable virtual reality experience. Proper battery management not only ensures operational readiness but also extends the lifespan of your controller, thereby enhancing your overall gaming experience.
In summary, whether using handheld wand controllers with replaceable batteries or those with built-in rechargeable batteries, maintaining power supply is crucial. Adopting these practices and insights will significantly improve your virtual reality interactions, providing uninterrupted, high-quality gaming sessions.
Tools needed for replacing VR controller batteries
Replacing the battery in your VR controller is generally a straightforward process, but it can become a hassle if you’re not properly equipped. Having the right tools and preparation can make this task much smoother. Let’s delve into the essential tools and tips for a hassle-free VR controller battery replacement:
1. Screwdrivers:
- Your Trusted Allies: Depending on your VR controller model, you may need a screwdriver to access the battery compartment. Ensure you have the correct size and type of screwdriver to fit the screws on your controller;
- Prevent Damage: Using the wrong size or type of screwdriver can lead to damage. Know your controller type and screw specifications to avoid unnecessary harm.
2. The Correct Batteries:
- Model-specific Batteries: Different VR controllers require specific battery types. Consult your user manual or the manufacturer’s website to determine the right batteries for your controller;
- Stock Up: Always keep a stock of replacement batteries on hand for quick changes, so you never experience downtime when your controller runs out of power.
3. Cleaning Tools:
- Maintain Cleanliness: Dust and debris can affect battery contacts and hinder controller performance. Keep cotton swabs and rubbing alcohol on hand.
- Cleaning Process:
- Gently clean the battery compartment and contacts before replacing the battery;
- Ensure optimal connection and performance by removing any dirt or residue.
4. A Safe Workspace:
- The Importance of Space: While not a traditional tool, a clean, well-lit workspace is crucial.
- Organization:
- Use a small tray or container to keep track of removed screws and small parts, preventing them from getting lost;
- Adequate Lighting: Good lighting is essential to see small details and work comfortably.
By preparing these tools and following these tips, you’ll be well-equipped for a seamless VR controller battery replacement procedure. This preparation not only saves you time but also enhances the longevity and performance of your VR controller. Your VR gaming experience will remain uninterrupted, and your controller will function optimally.
Step-by-step guide for changing the batteries in a VR controller
Maintaining your VR controller’s power supply is crucial for an uninterrupted, immersive gaming experience. Here’s a detailed guide to help you navigate the battery replacement process step-by-step:
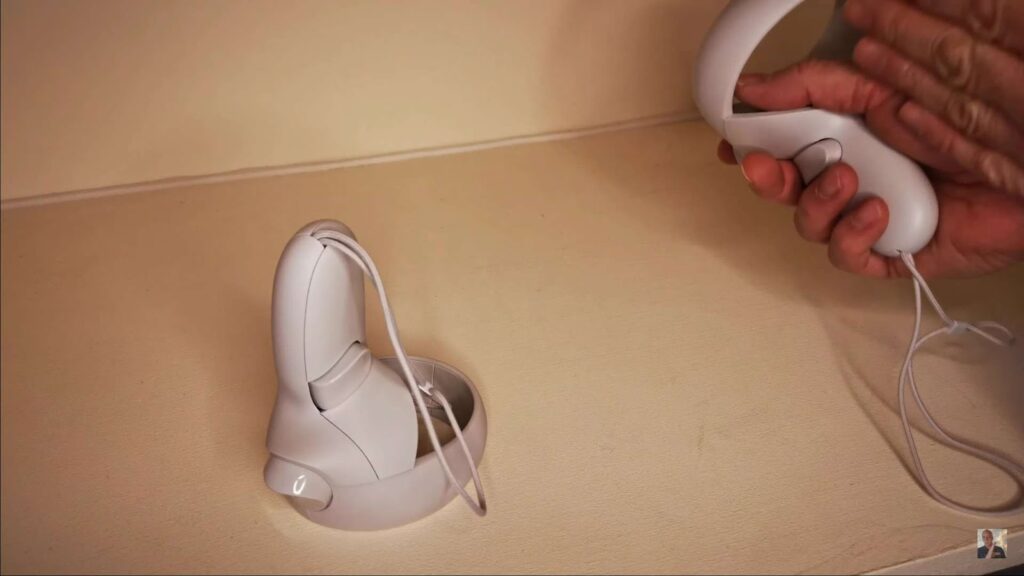
Step 1: Identify Your VR Controller Type Your VR controller type is instrumental in determining your battery needs and how to access the battery compartment. Some controllers use standard batteries, while others have built-in rechargeable batteries. Refer to your user manual or manufacturer’s website to accurately identify your controller type.
Step 2: Locate the Battery Compartment For a handheld wand controller, the battery compartment is typically on the back or underside of the controller. The access panel or cover can usually be slid off or unscrewed, depending on the design. For controllers with built-in rechargeable batteries, the charging port is typically on the side of the controller.
Step 3: Prepare Your New Batteries or Power Source If your controller requires standard batteries (like AA or AAA), ensure you have fresh ones ready. For controllers with rechargeable batteries, ensure that your power source is ready and that your USB cable is in good working condition.
Step 4: Insert New Batteries or Connect to Power For standard batteries, insert them according to the polarity indicators in the battery compartment. Incorrect placement may damage your controller or reduce its performance. For rechargeable controllers, connect the USB cable to the controller and the other end to a power source.
Step 5: Secure the Compartment Cover or Start Charging For the handheld wand controller, slide or screw the battery compartment cover back once the batteries are correctly placed. Ensure it’s tightly secured to avoid any loosening during gameplay. For rechargeable controllers, ensure the controller is charging by checking the charging indicator on the controller or the cable.
This detailed guide is designed to help you maintain your VR controller’s power and ensure smooth, uninterrupted gaming sessions. Always refer to your user manual for specific guidelines related to your specific VR controller model, as the steps may slightly vary by manufacturer or model. Being familiar with these steps provides a sense of empowerment over your VR gaming setup and contributes to an overall enhanced gaming experience.
Tips and tricks for prolonging the life of VR controller batteries
Getting the most out of your VR controller battery life can significantly enhance your gaming experience by reducing interruptions and increasing playtime. Here are some valuable tips and tricks to help extend your VR controller battery life:
- Switch Off Your Controller When Idle: While it may seem simple, it is easy to overlook this, especially during an intense gaming session. Remember to power off your controller during breaks or when not in use. This simple practice can significantly prolong the life of your batteries;
- Customize Controller Settings: Some VR systems provide options to alter the controller settings. For instance, you can lower the intensity of vibrations or reduce the brightness of LED lights. Tweaking these settings can help save battery power;
- Optimize Your Gaming Environment: A well-calibrated VR system in a suitably lit gaming area can contribute to more efficient tracking sensor and controller functionality. When these components function efficiently, they minimize unnecessary controller motion, thus saving battery life;
- Maintain a Clean Controller: Dust, grime, and debris can impair your batteries’ performance. Regular cleaning of the battery compartment and contact points maintains a solid connection, positively impacting battery life;
- Use Quality Batteries: If your VR controller uses regular batteries like AA or AAA, it’s worth investing in high-quality ones. These usually offer better performance and longevity compared to cheap, off-brand options;
- Timely Recharge for Built-In Batteries: For controllers with rechargeable batteries, avoid draining the battery completely before recharging. Lithium-ion batteries, common in many electronic devices, have longer lifespans when they’re kept charged and not frequently dropped to zero.
Remember, while these strategies can help extend battery life, even the best-maintained batteries will eventually need replacing. Be prepared by keeping spare batteries nearby or a charging cable ready for controllers with built-in rechargeable batteries. This way, you’re always ready for continuous, immersive VR gaming experiences.
Troubleshooting common issues with VR controller batteries
While taking good care of your VR controller batteries is key, occasionally you may encounter some common problems. Don’t despair, as most of these issues can be fixed with some simple troubleshooting steps. Here are some common dilemmas and practical solutions:
Problem: The Controller Won’t Power Up If your VR controller refuses to turn on, the first step is to examine the state of your batteries. If you’re using regular batteries, try replacing them with fresh ones. For those with built-in rechargeable batteries, ensure they’re properly charged. Cross-check the battery placement and alignment. If the problem persists, a controller reset may be needed, and your user manual will have specific instructions on this. If all fails, reach out to the customer service of the controller’s manufacturer.
Problem: Batteries Deplete Rapidly When you notice an unusually quick battery drainage, first inspect whether your batteries are of high quality and compatible with your controller. Adjusting the settings on your controller like lowering vibration intensity or LED brightness can also help extend battery life. Furthermore, efficient controller and sensor functioning can be achieved with a well-lit gaming area and properly calibrated VR system.
Problem: Connectivity Issues with the VR System If you’re experiencing difficulties maintaining a connection between your controller and VR system, start with reviving the batteries—either replace or recharge them. Ensure that the space between the controller and the VR system is clear, with no objects that might cause interference. Check for any available firmware updates for both your VR system and controller, as keeping your system updated can resolve numerous connectivity problems.
Troubleshooting these common problems does not only bring you back into the game faster, but also contributes to a more profound understanding of your VR gear, fostering a more satisfying and worry-free gaming experience. Remember, for persisting issues or those beyond your scope, never hesitate to contact your controller’s customer service. They are there to help! Read about the magic of AR! Unveil the secrets of what does the mesh do in augmented reality. Dive into a world of innovation and wonder.
Conclusion
In this informative blog post, we delved into the significance of understanding the procedure for changing the batteries of your VR controllers, presenting you with a comprehensive step-by-step manual for a seamless experience. By remaining well-informed about the specific VR controller model you own and its battery requisites, procuring the appropriate tools, and adhering to our expert guidance, you can effortlessly replace the batteries, thereby sidestepping any disruptive interruptions during your gaming sessions. Furthermore, we have generously shared some invaluable tips and tricks designed to extend the battery lifespan and effectively troubleshoot prevalent issues.
With this newfound knowledge at your disposal, you can confidently take the reins of your gaming escapades, ensuring that your forays into the realm of virtual reality remain uninterrupted and immensely enjoyable. So, without further ado, embark on this battery-swapping journey, allowing you to plunge back into the immersive universe of virtual reality gaming with renewed vigor and enthusiasm!
Happy
0 %
Sad
0 %
Excited
0 %
Sleepy
0 %
Angry
0 %
Surprise
0 %


Average Rating